Our Robin Hood - Sherwood Builders Guide will teach you the basics, explain the HUD, and give you a walkthrough for the first hour of the game!
Robin Hood - Sherwood Builders has you taking on the role of the legendary outlaw. There are a lot of resources to uncover on the Map, but you'll have to learn the basics of the game first — read on for an explanation of the HUD and a walkthrough for the first hour!
Robin Hood - Sherwood Builders HUD Explanation
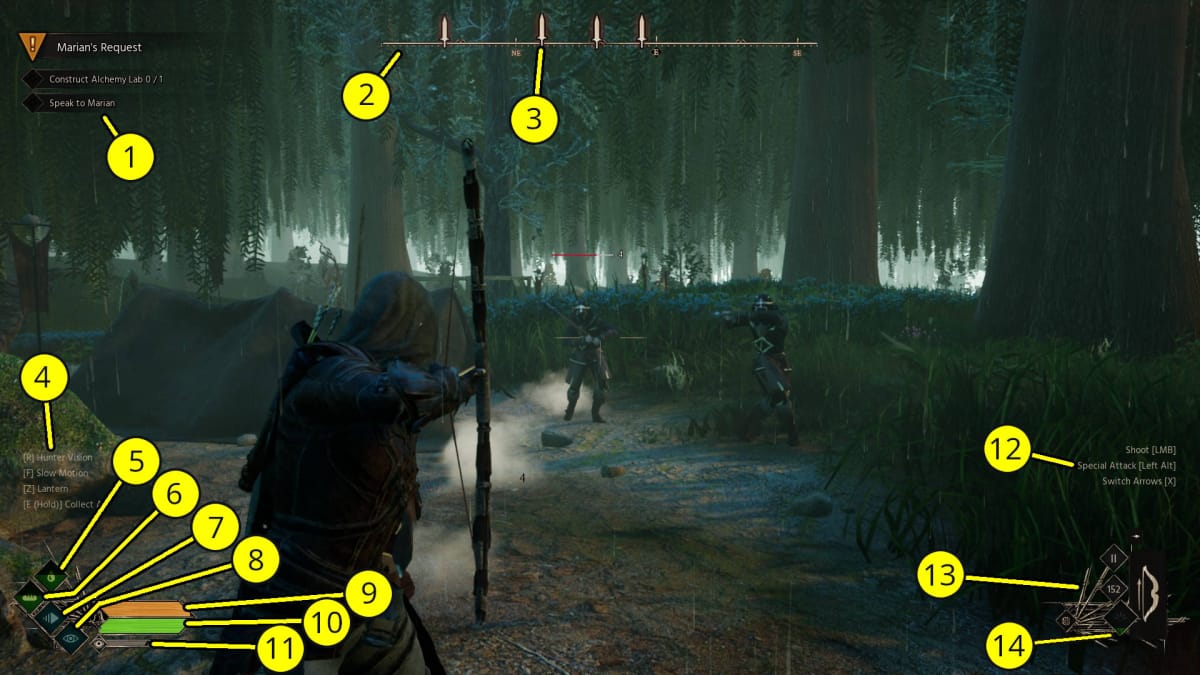
- Tracked Quest: This shows your currently tracked Quest and its objectives.
- Compass: The standard Compass showing you which direction you're facing and any notable points of interest. When you're in combat, it will instead show you where the enemies you're fighting are.
- Enemies: When in combat, enemies are indicated by a sword icon on the compass.
- Controls: Some of the controls are highlighted on-screen on the left.
- Thirst: This shows your Thirst. You'll need to drink water (or other liquids, such as Beer). Having low Thirst can be detrimental to your health and stats.
- Hunger: This shows your Hunger. You'll need to eat food to keep it up. As with Thirst, having low Hunger can be detrimental to your stats.
- Slow Motion Indicator: This shows when you've activated Slow Motion.
- Hunter Vision Indicator: This shows when you've activated Hunter Vision.
- Stamina: Your Stamina meter. Jumping, using tools, or swinging weapons will reduce your Stamina.
- Health: The standard Health bar. If this drops to 0, you'll die and you'll have to reload your latest save.
- Stealth: This shows how well you're hidden. The lower the bar, the better your stealth. Factors such as light and cover can impact this.
- Weapon/Tool Controls: Weapon and tool controls are shown here based on what you have equipped.
- Equipped Tool: Your currently equipped tool and its status (such as ammo) are shown here.
- Tool Durability: The durability of your currently equipped tool is shown in this diamond.

Robin Hood - Sherwood Builders Guide | Starter Guide Walkthrough
Now that we've gone over the HUD, it's time to dive into our Robin Hood - Sherwood Builders Starter Guide!
Beginning Your Adventure
You'll begin your adventure as Robin Hood in medias res — that is to say, in the middle of your adventure. Robin and his Merry Men have had to retreat after their first base of operations was burned down and you'll begin in his new partially-constructed village in Sherwood Forest.
First, you'll have to make two choices for options:
- Precise or Dynamic Combat: There are two ways that combat works in this game.
- Difficulty: This is your standard difficulty setting. The higher difficulty can make enemies tougher.
Walk into Robin's Village and talk to Friar Tuck. After a short conversation, he'll give you some food and water. Go into your inventory and equip them onto your hotbar on the left of your inventory. Then, you can either select the item with the weapon wheel by pressing Tab or by pressing the associated number on the number row.
Visiting Home
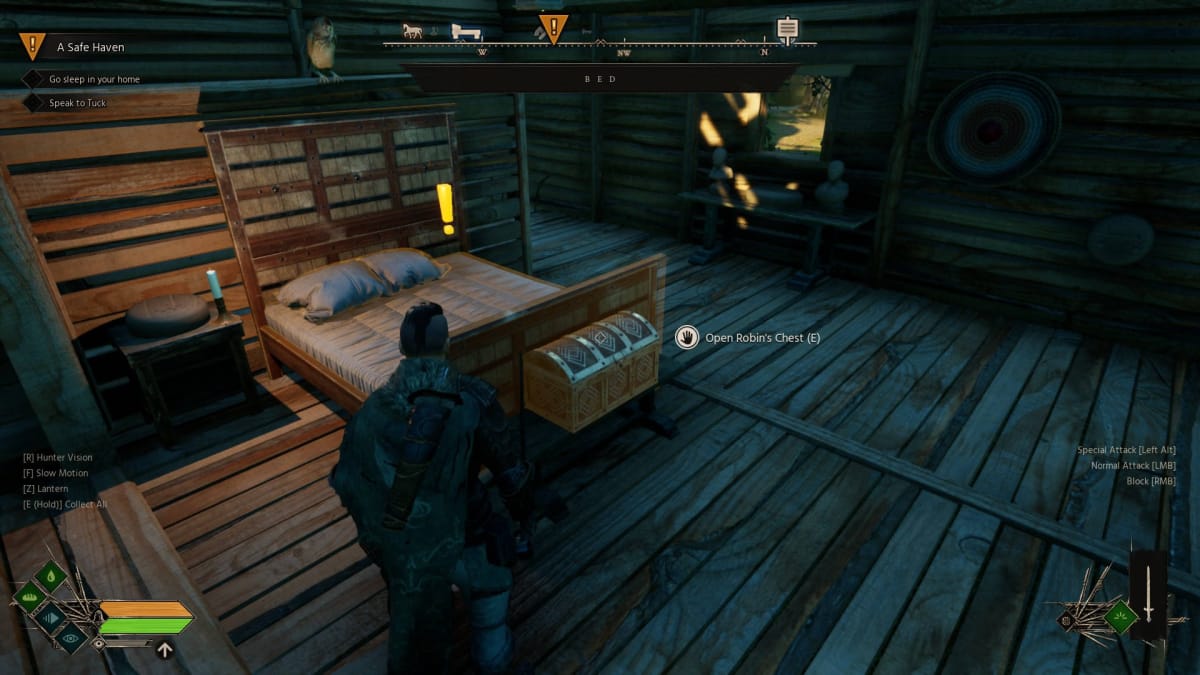
Next, Friar Tuck will tell you to go home. You can find your house to the left of Friar Tuck. Before heading inside, grab the fliers on the bulletin board outside; these will give you tips about the game and clues for potential Quests.
Maid Marian can be found out front. Have a chat with her if you like, then head inside. You'll find "Robin's Chest" at the foot of the bed — this is essentially a stash that you can access from multiple points in the game world. It's a good place to store food and equipment without cluttering up your inventory.
Go to sleep in your bed and wake up at dawn by selecting the sun symbol to the left.
Learning Some Skills
Now that you're awake, it's a good time to use some of your Skill Points. Press H to open up the Passive Skills Tree.
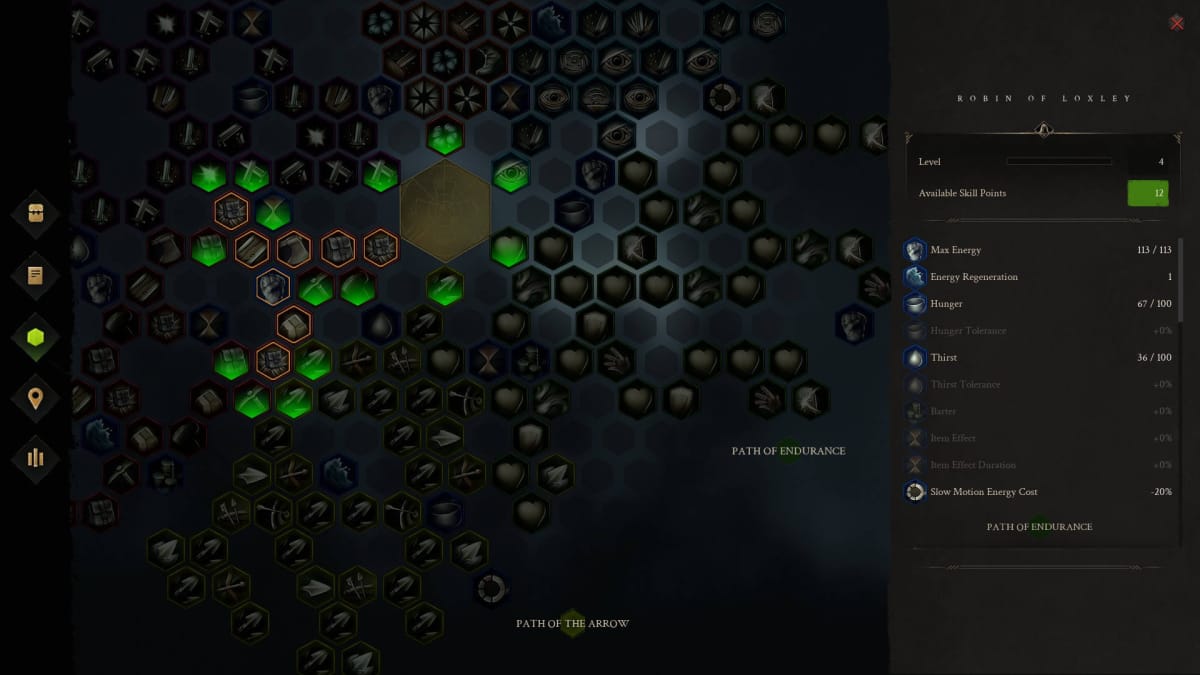
You can unlock more Passive Skills by spending points on adjacent Passive Skills. The best thing to do is to decide on what kind of strategy you'd like to go with and picking Passive Skills in that direction.
There are, of course, active Skills that you can learn as well. Most of these are unlocked by placing additional buildings in Robin's Village. You can find out more about this by inspecting the buildings in the Village Construction menu. For now, let's move on.
Getting Wood and Making a Bow
Talk to Friar Tuck again and he'll task you with getting some Pine Wood. Head east and chop down at least twice the amount he's asking for; you're going to need more Pine Wood soon, so you may as well grab it now.
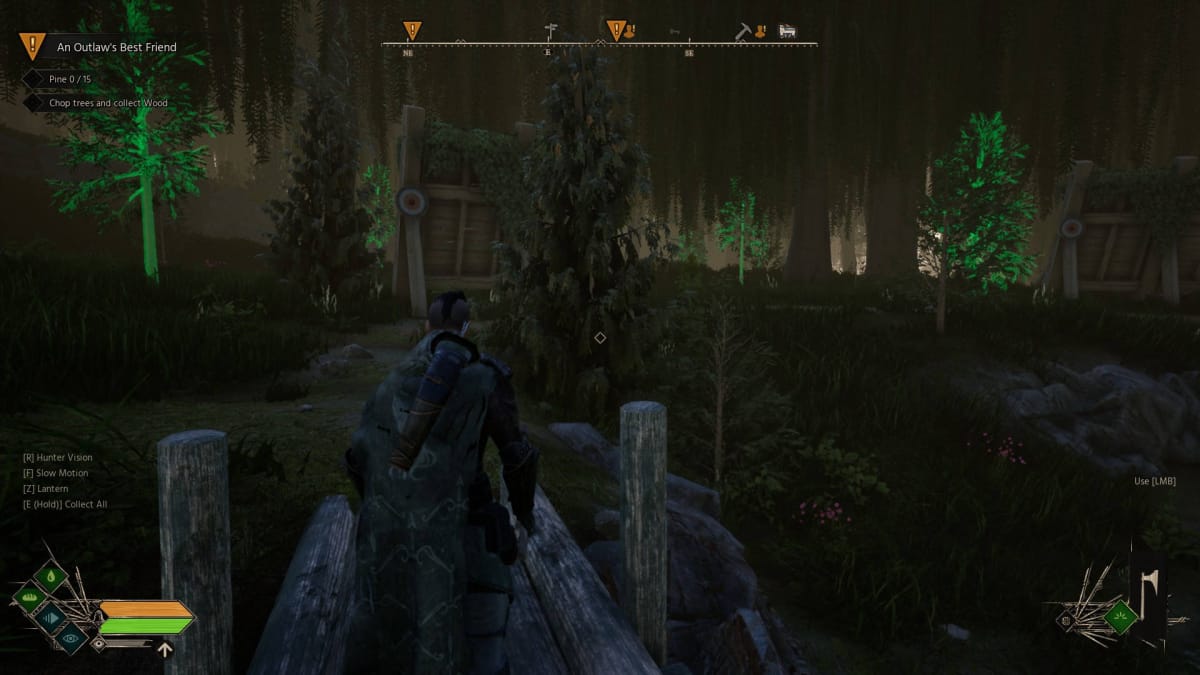
Craft a Makeshift Bow as soon as you have enough Pine Wood to make it, then craft at least 80 Wooden Arrow. Head back to town and place the excess Pine Wood in the Village Storage in the building to the right of Friar Tuck.
Hunting Deer
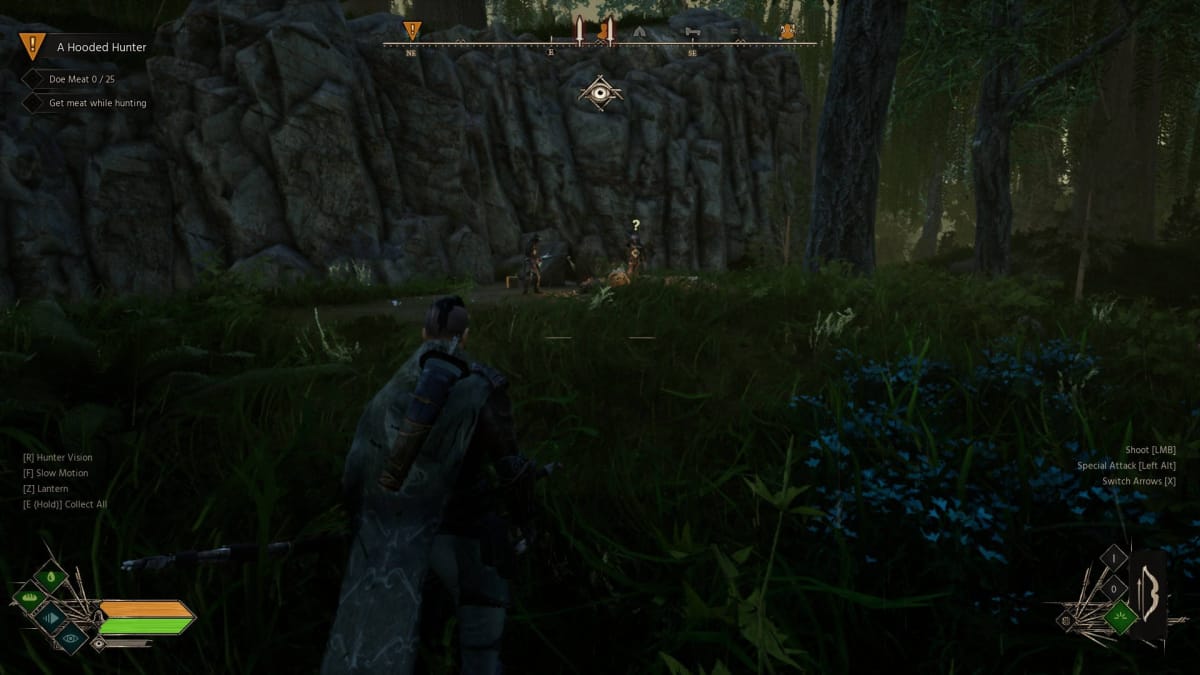
Friar Tuck will now task you with hunting some deer (does, to be specific) to feed the village. Head east toward the shacks with archery targets on them, then turn north to get to the high ground.
As with the Pine Wood, you're going to want to get some extra beyond the 25 required for this Quest — you can use the meat to make Roast Doe, a hearty food source that will sustain you in the early game. When you have around 35 or so meat, place a stack of 25 in the Village Storage and return to Friar Tuck.
Building a House
Your next step will be to build a house. You're going to need Stone in addition to Pine Wood. You can most easily find Stone lying on the ground in Robin's Village. Grab at least 30 Stone in total since you'll need more for the next Quest.
Go to the Construction Table, select a House, and attach it to one of the large trees. Remember, you'll need to have resources in Village Storage for it to count toward construction.
Once you've placed the house, it will take your workers a short time to build it; it won't pop up instantly. Walk back over to Friar Tuck and the objective should be completed by the time you get to him.
Building a Furnace
Our good friend Friar Tuck will give you another building task. This time, you'll be making a Furnace. You should have enough Pine Wood and Stone from your earlier collection endeavors, but you're also going to need Reeds.
Head west and collect a few bundles of Reeds by the river. Place them in the Village Storage, then go to the Construction Table. You'll have to left-click on the thinner trees to destroy them and make room.
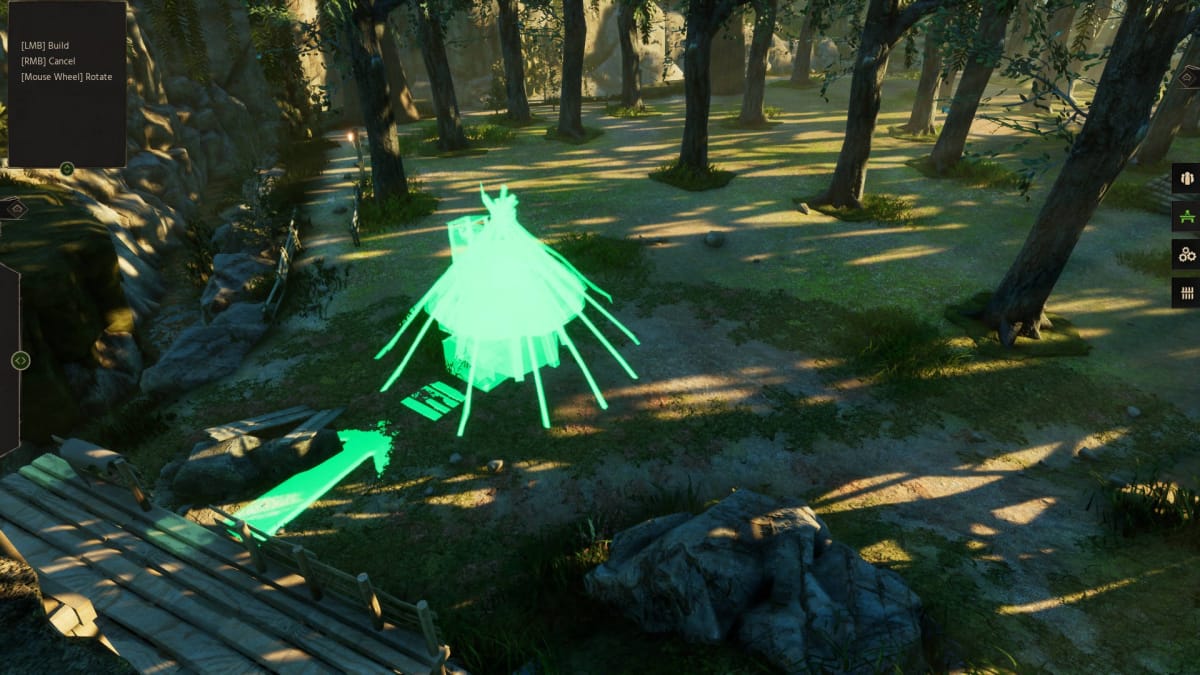
Now that a bit of ground has been opened up, you can place the Furnace on the ground. As before, it will take a short time for your workers to construct it. You'll be able to complete this Quest once you talk to Friar Tuck.
Heading Out Into the World
Friar Tuck's final task, for now, is to head out into the world and do some good. Speaking with him will give you two Quests: "Unhealthy Competition" and "John Lackmine." Go through the dialogue trees to accept them both.
You will now be able to speak with other people in Robin's Village (such as Little John and Marian) to get Quests. There's no reason not to find out what they need your help with, so talk to everyone you can.
This is also a good time to do a bit of cleanup. There are a lot of loose crafting materials and food items lying around in the open and in crates. You should consolidate everything in Robin's Chest, the regular chests in Robin's house, and the Village Storage as needed.
By now, you'll have a fair few items stocked up, a bunch of quests to complete, and a solid understanding of the game's basics. It's time to head out into the world and start fighting against the sheriff, corrupt bandits, and any other evildoers that you can find. Have fun, and make sure to check out our other guides below!

Robin Hood - Sherwood Builders Multiplayer Functionality
Robin Hood - Sherwood Builders does not have multiplayer; it is a single-player game.
Robin Hood - Sherwood Builders Save File Location
You can find the Robin Hood - Sherwood Builders save files in:
C:\Users\USERNAME\AppData\Local\RobinHoodFull\Saved\SaveGames
Where "USERNAME" is your Windows username.
Robin Hood - Sherwood Builders Death Consequences
If you die in Robin Hood - Sherwood Builders, you'll have to reload your latest save.
Thanks for checking out our Robin Hood - Sherwood Builders Guide. Make sure to check out our other guides below!
Have a tip, or want to point out something we missed? Leave a Comment or e-mail us at tips@techraptor.net
