This Enshrouded Guide will help you get started with the game and teach you some basic tips and tricks to help you survive the ruined world of Embervale.
Enshrouded is a survival and action-adventure game very much in the style of Valheim -- you're placed into a large world filled with otherworldly enemies and a lot of land to explore on the map. In this guide, we'll teach you the basics of surviving the Shroud and walk you through the opening hour of the game, Read on to learn how to get started with Enshrouded!
Enshrouded HUD Explanation
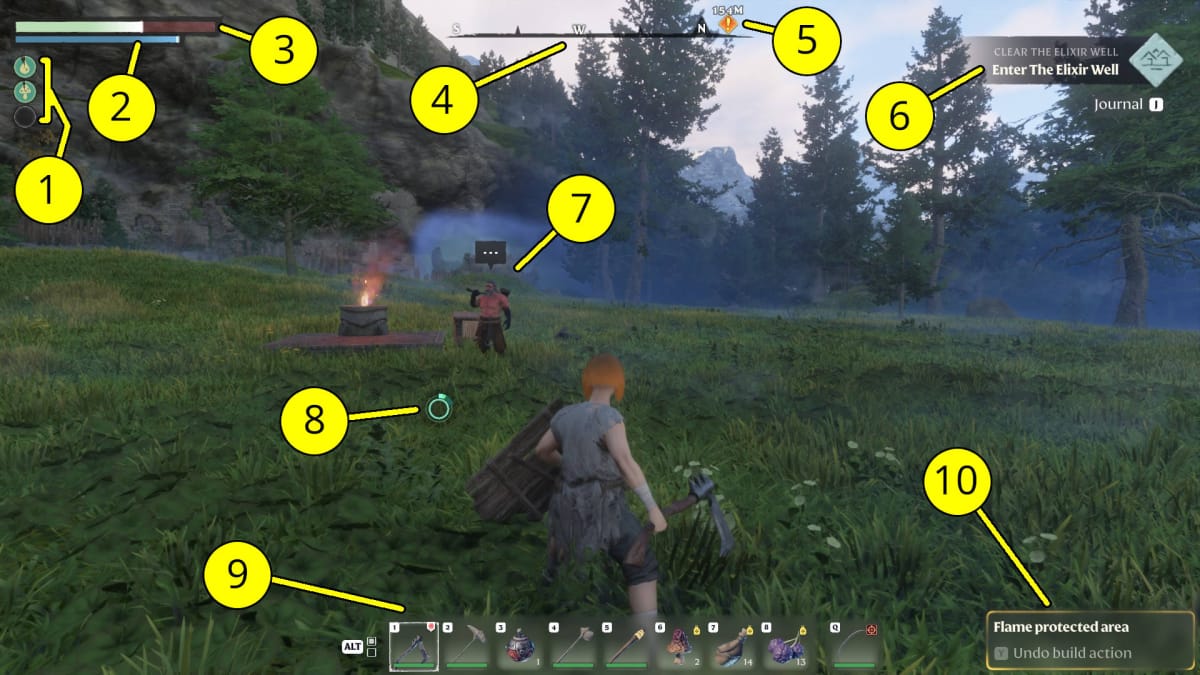
- Food Slots: This shows the three food buffs that you currently have active and how long is left until they expire. You can see specific details of each buff in the Character Screen under "Status details..."
- Mana Bar: This shows how much Mana you have. You won't really need to worry about Mana until you get some magical weapons later in the game.
- Health Bar: This is your bog-standard Health Bar. If it drops to 0, you die. You can increase the size of your Health Bar by eating certain Foods to buff your Constitution stat; typically, cooked Meat will boost your HP.
- Compass: This shows you which direction you're currently facing.
- Tracked Quest: Any tracked Quests or pinned Waypoints will appear on the Compass as a diamond-shaped icon.
- Current Quest Objective: This shows you a summary of your current Quest objective. You can read more details about it by opening your Journal.
- NPC: Any NPCs you have near your base can be located by looking for their speech bubble.
- Stamina: This is your Stamina meter. As with Health, you can increase it by eating certain foods. If it runs out, you won't be able to run, dodge, use your Glider, or perform certain attacks.
- Hotbar: Your Hotbars are where you store all of the equipment and consumables that you might want to use on the fly. You have two Hotbars by default. If you die, you won't lose any items on your Hotbar.
- Building Indicator: If you're at one of your bases, you'll see this indicator telling you that you're in an area protected by a Flame Altar.

Enshrouded Guide | Starter Guide
Now we'll move on to the starter guide portion of this Enshrouded guide! Here's a walkthrough that will cover the opening moments of the game.
Creating Your Character and Waking Up
Your adventure begins with creating your character's appearance. You'll then pop out of a strange-looking pod and find yourself in some kind of temple.
This is the Cinder Vault, a place where your people have slumbered until they could awaken and save the world. Walk outside and commune with "The Flame," the large burning torch in the center of the room. This will unlock the recipe for the Flame Altar and open up the door to the outside.
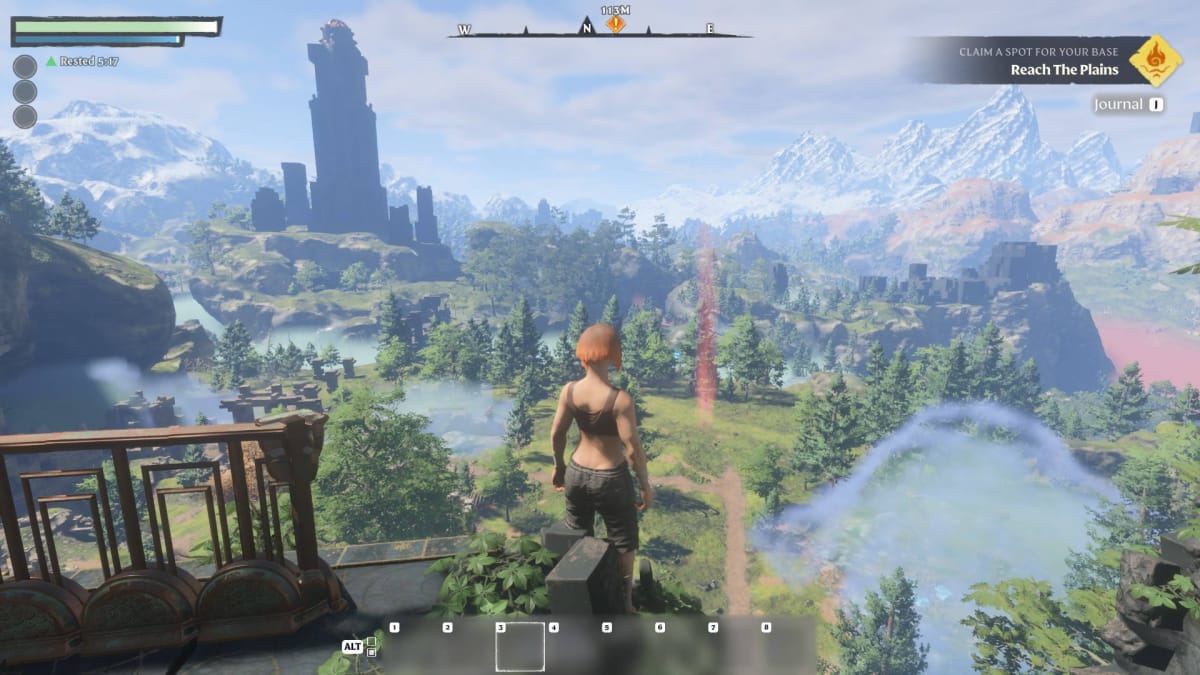
The large tower in the distance is an Ancient Spire -- this is a location that serves as a permanent Fast Travel point on the map after you unlock it. It's also a great place to use your Glider once you get one.
For now, run to the left and follow the path down into the caves.
Getting Armed
You'll see a Torch on the ground at the entrance of the cave. Pick it up and head inside. There's a dropdown up ahead, but turn left first -- you'll see some rubble and a tooltip about breaking terrain.
We don't have a Pickaxe just yet, so pick up all of the Explosive Powder Balls nearby. Stand at least 15 feet (5 meters) back and throw one at the top of the rubble. Try to jump over it; if you can't make it through, throw a second Explosive Powder Ball to open up the hole wider.
You'll find a chest on the other side of the rubble with a Level 1 Hatchet inside. This is a good melee weapon to start off with, so grab it and then walk further into the depths.
Dipping Your Toe in the Shroud
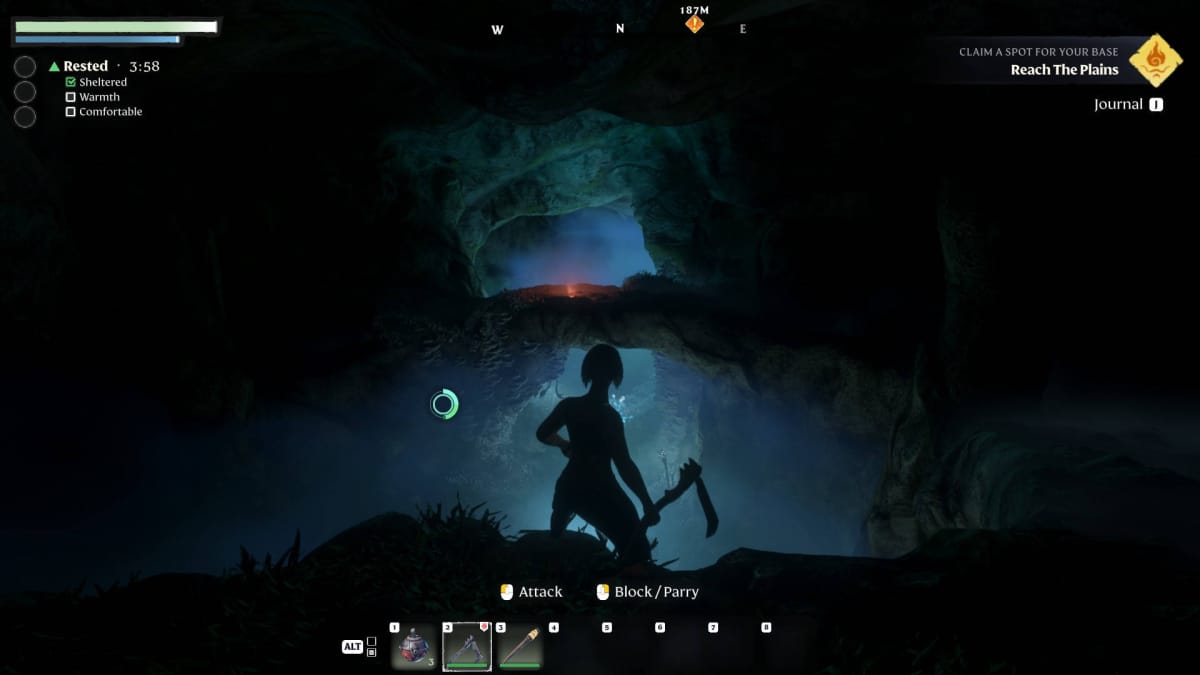
You'll eventually encounter a mysterious blue fog below you in a darkened area of the cave. This is the Shroud, a deadly mist that can eventually kill you. This is also where you're going to encounter your first enemies.
Carefully walk into the Shroud and take out the enemies within, one by one.
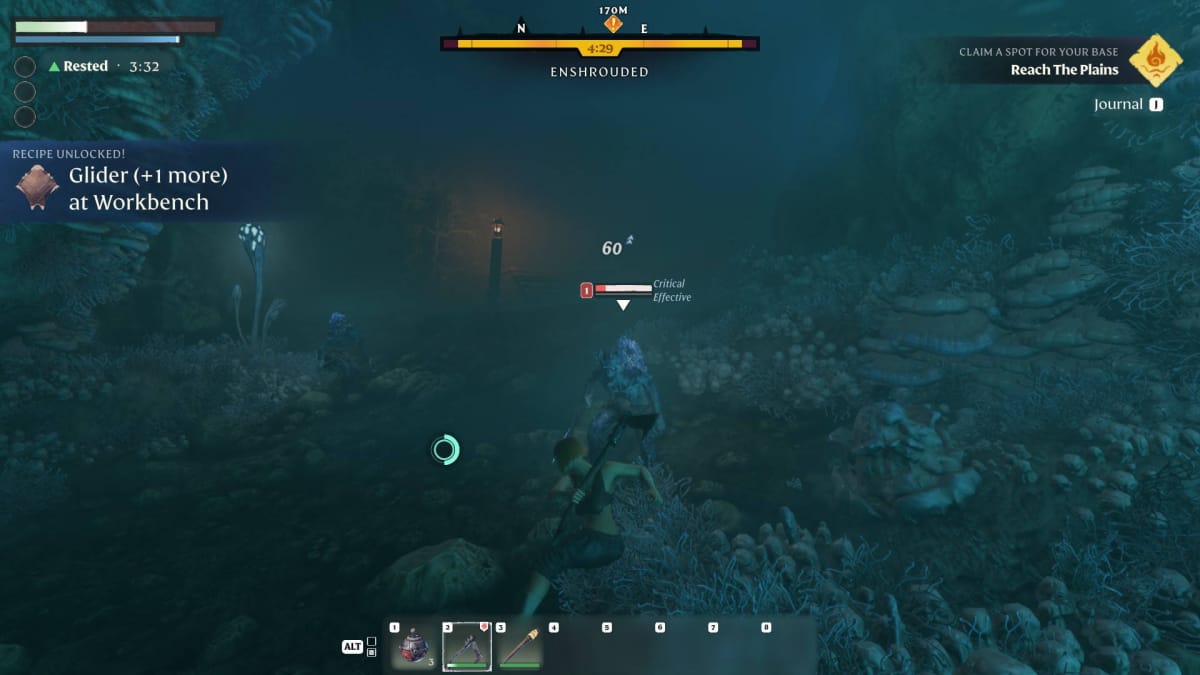
These creatures shouldn't be too much of a challenge. If you do suffer a run of bad luck and die, you'll respawn nearby and you'll be able to attempt passing through this area again.
Make your way through this short bout of Shroud and you'll exit the cave a little closer to your goal of setting up a base.
Looting Longkeep
Immediately outside of the Shroud cave is an abandoned town called "Longkeep." Longkeep has a fair amount of loot that you can pick up. Inspect everything and take the time to destroy any bundles, crates, barrels, or containers -- they can all drop something useful.
You can also find your first Well here -- this is a good source of Water in the early game. Grab as much Water as you can so you can keep your Stamina regeneration up. When you've finished looting this area, head down to the marked area in the plains below.
Building Your First Base
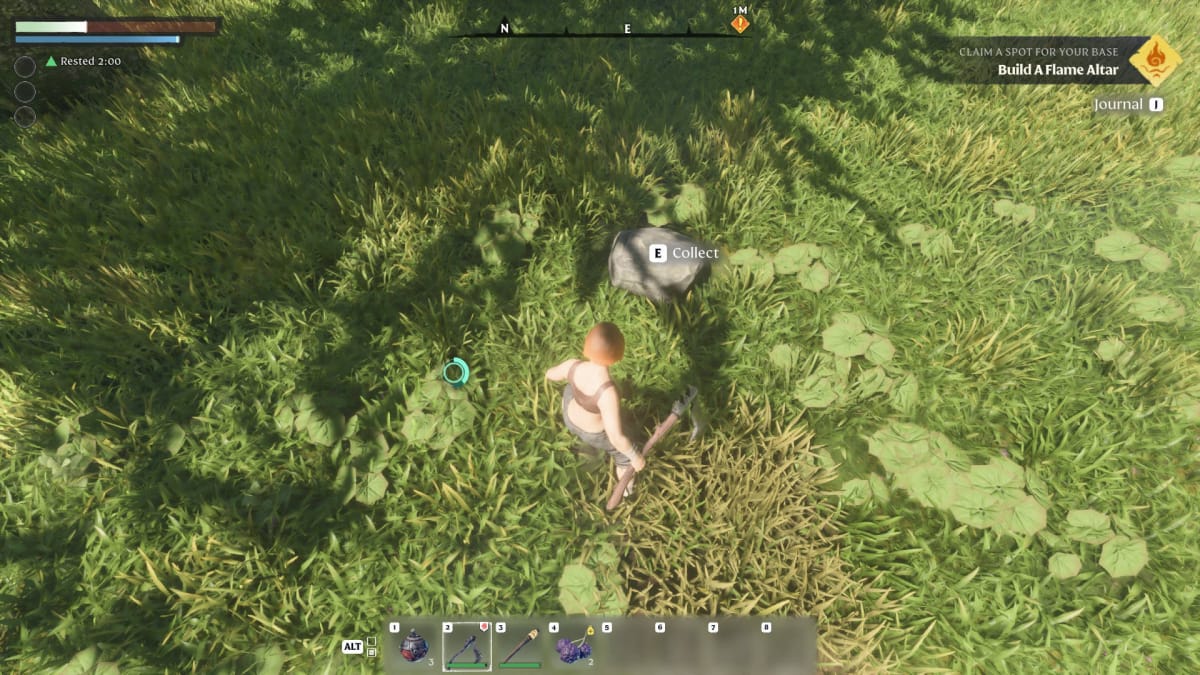
Now that you're at the location for your base, your first order of business is to collect Stone. Collect at least 5 Stone, then press V to open up the crafting menu. Craft a Flame Altar and place it on the ground.
The Flame Altar defines the borders of your base. You can also press X on the keyboard to sit down next to it and gain the Rested buff. Once the base is built, you'll be given a Quest to rescue your first NPC -- but we're going to do a little preparation before that.
Getting Ready for the Shroud
You should craft some basic equipment and supplies before heading into the Shroud -- here's what you're going to need to make in the Crafting menu:
- Axe
- Pickaxe
- Workbench
- Construction Hammer
- Campfire
- Tiny Chest
- A Second Flame Altar
- Shield
- Bow
- Wooden Arrow x20
- Ragged Shirt
- Ragged Boots
The Axe and Pickaxe are needed for chopping down trees and digging up the ground, respectively. The Workbench will allow you to craft some more advanced items and repair your tools, and the Construction Hammer can be used to eventually build your base.
The Campfire, in particular, will allow you to cook food -- we'll get to this before we leave for the Shroud. The Tiny Chest will allow you to safely store the resources you've collected before you leave for the Shroud. We'll need the second Flame Altar later.
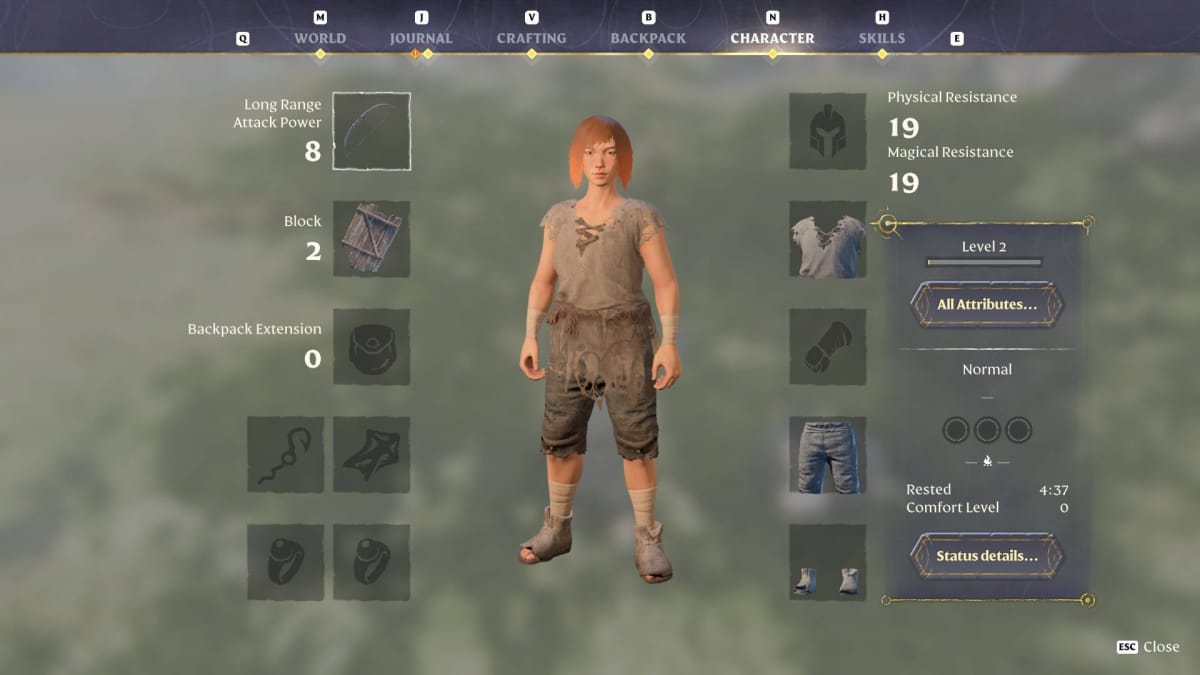
As for the rest of the list, this equipment will increase your chances of survival. Equip everything on the Character menu; it will look like this:
You will probably need to harvest resources in the area around your base to get all of this stuff. I assure you, there's plenty of stuff to collect in the immediate area!
Choosing Your Skills (and Taking a Nap)
By now, you'll likely have advanced to Level 2. That means you'll get a Skill Point -- it's time to choose your first Skill.
Enshrouded has a node-based Skill Tree similar to games like Path of Exile. Your first goal, in my opinion, should be to make your way toward the Double Jump Skill.
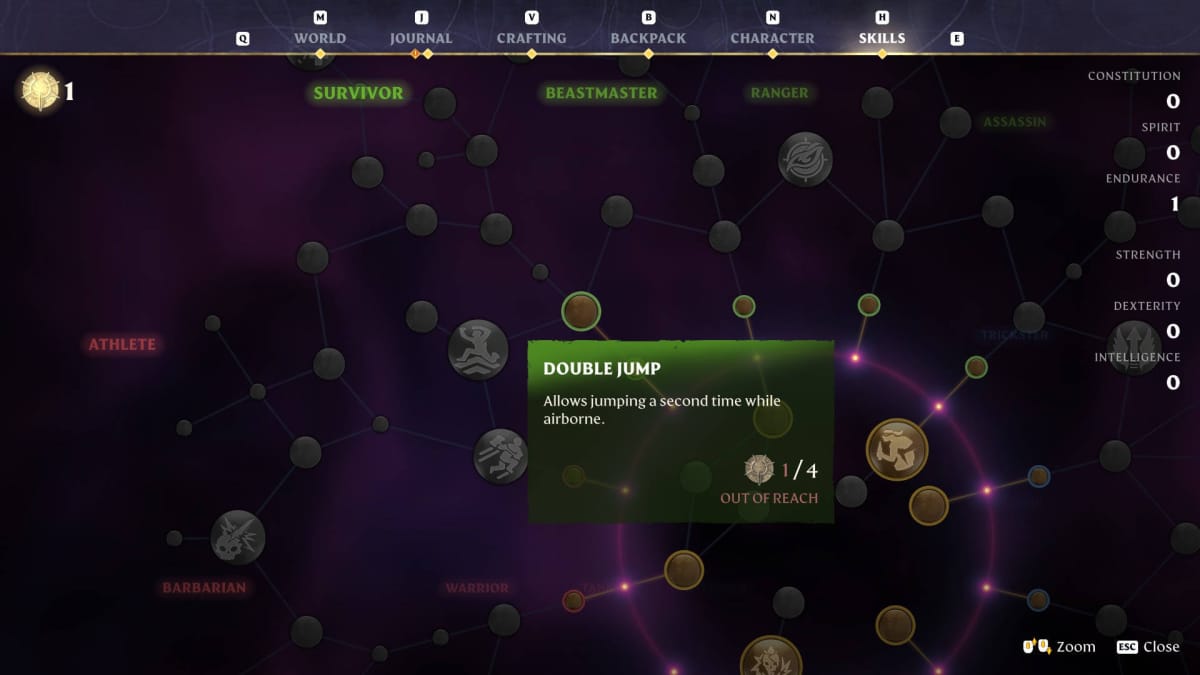
Double Jump is supremely useful -- especially in the early game. Pick a Skill that leads you toward it, and focus on spending your Skill Points on anything that will get you to Double Jump as fast as possible.
It's probably getting close to nighttime by now (or it may already be night). You can't craft a bed just yet, so for now, activate your Torch and find a bed in Longkeep. Sleep there and then return to your base after the sun rises.
Heading Into the Shroud
It's finally time to head into the Shroud and rescue the Blacksmith! Sit by the Campfire and cook any Red Mushrooms and Meat that you may have found.
Next, go to the Tiny Chest and empty out your inventory. Take only the essential tools and equipment. Your inventory should look something like this before you leave:
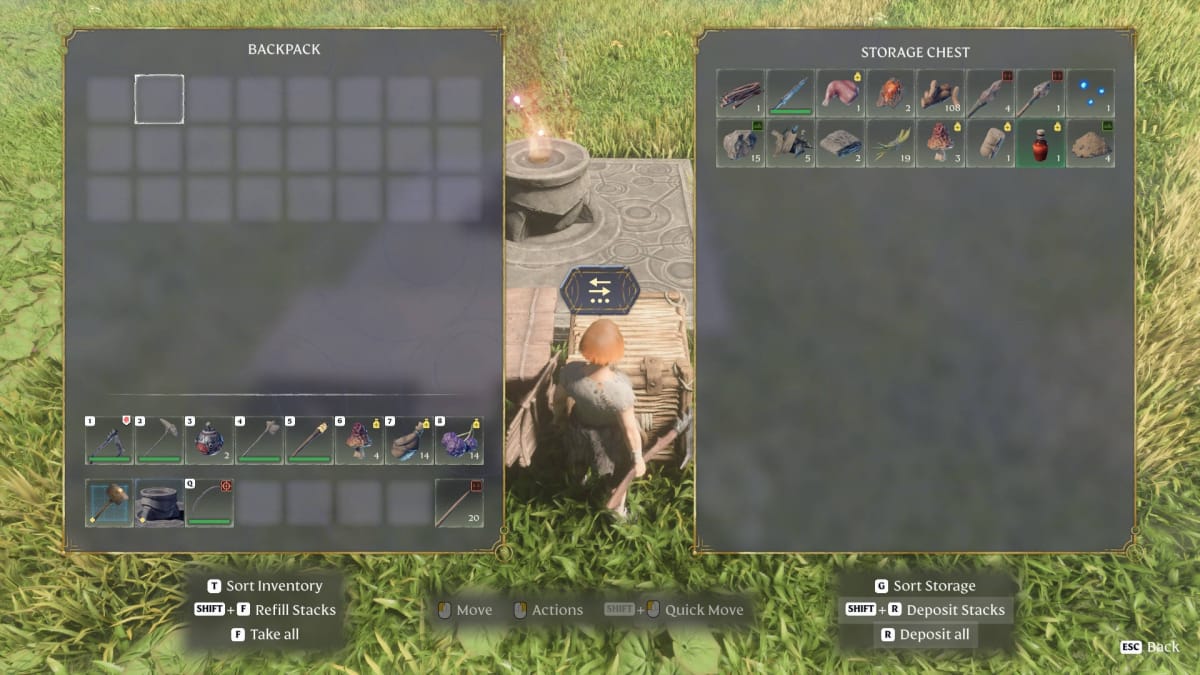
Head toward the Quest marker on your compass. You'll see a bridge in the distance. Don't try to cross the bridge -- it's broken and you don't have the tools to cross it.
Instead, head under this wooden arch and work your way down into the Shroud.
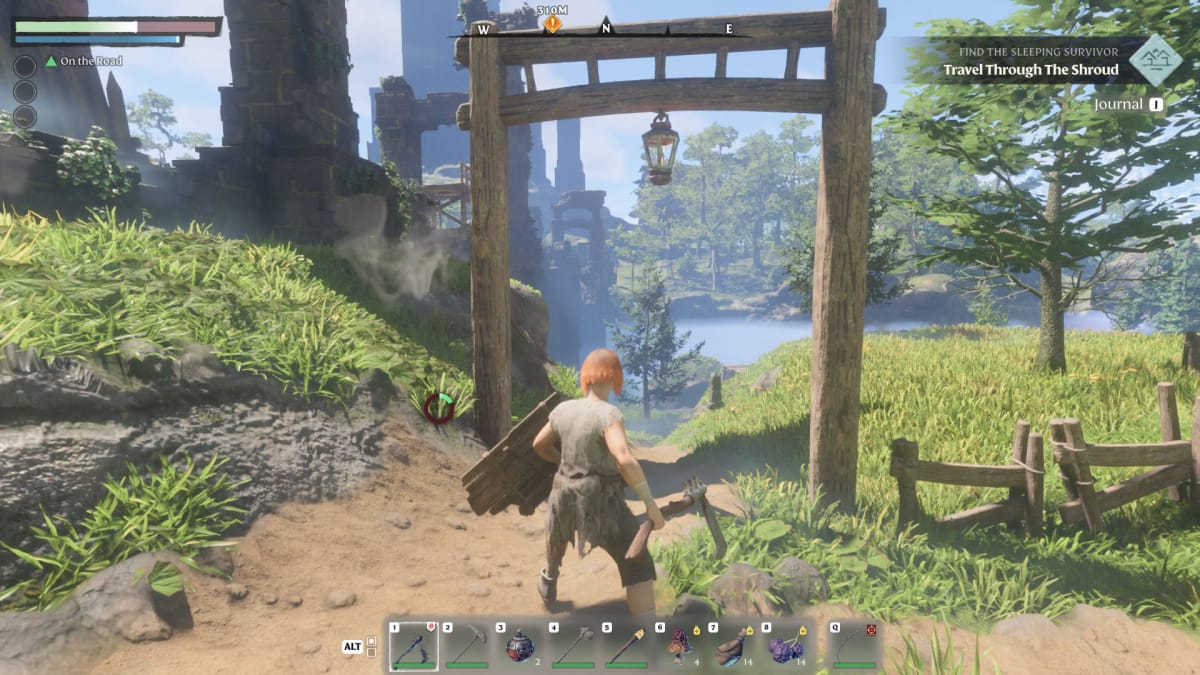
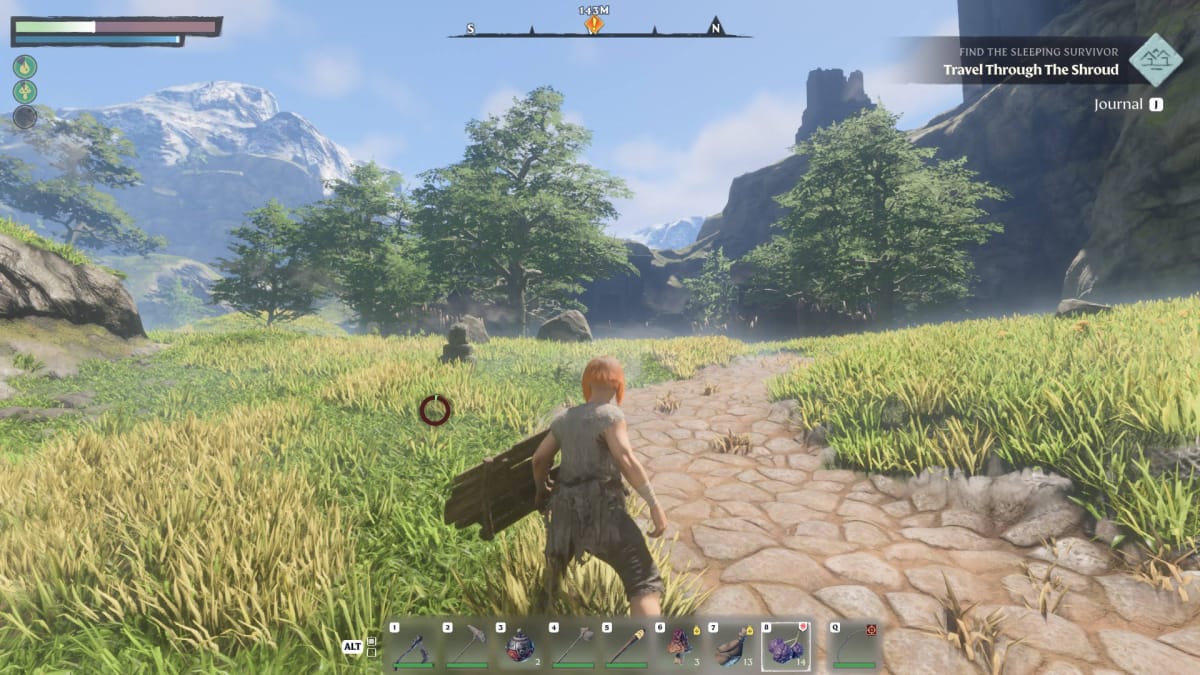
Don't jump off of the cliff or try to slide down it -- fall damage is very much a thing in Enshrouded and you'll die instantly. Drink some Water and eat some food to buff your stats, then follow the road down into the Shroud.
The road will continue through the Shroud. Stay on this path and it will take you to the other side of the broken bridge. You will encounter some enemies that you can choose to fight along the way, but you can just as easily outrun them.
Rescuing the Blacksmith
Once you're out of the Shroud and back near the bridge, you can follow the Quest marker on your compass to make your way to the Blacksmith's Ancient Vault. It's not too far away.
You will have to fight some Scavengers in the area outside of the Ancient Vault and inside of the Vault itself. You have several options here; you can conceal yourself in the bushes for a stealth attack, you can shoot them at range with a bow, or you can charge forward and fight them in melee combat.
Choose whichever approach is most comfortable for you and defeat all of the Scavengers in the area. If you die, you'll respawn back at your base; simply follow the same path through the Shroud to get back to the Ancient Vault. (Thankfully, the enemies won't respawn right away!)
If you take any damage, you can heal by simply waiting for your health to regenerate over a long period of time, eating a Purple Berry, or using a Bandage. Purple Berries can be found all around the starting area, and Bandages can be crafted in your inventory.
If you'd like, you can place down the Flame Altar that you brought with you; this will allow you to Fast Travel back to this place without running through the Shroud again. Keep in mind that you can only place a limited number of Flame Altars until you upgrade the strength of your Flame.
Once they're all dead, thoroughly loot the area -- you're sure to find some precious Metal Scraps on the Scavengers and outside of the Ancient Vault. Then, head inside the Ancient Vault and interact with the glowing pod that looks similar to the one you woke up in at the start of your adventure.
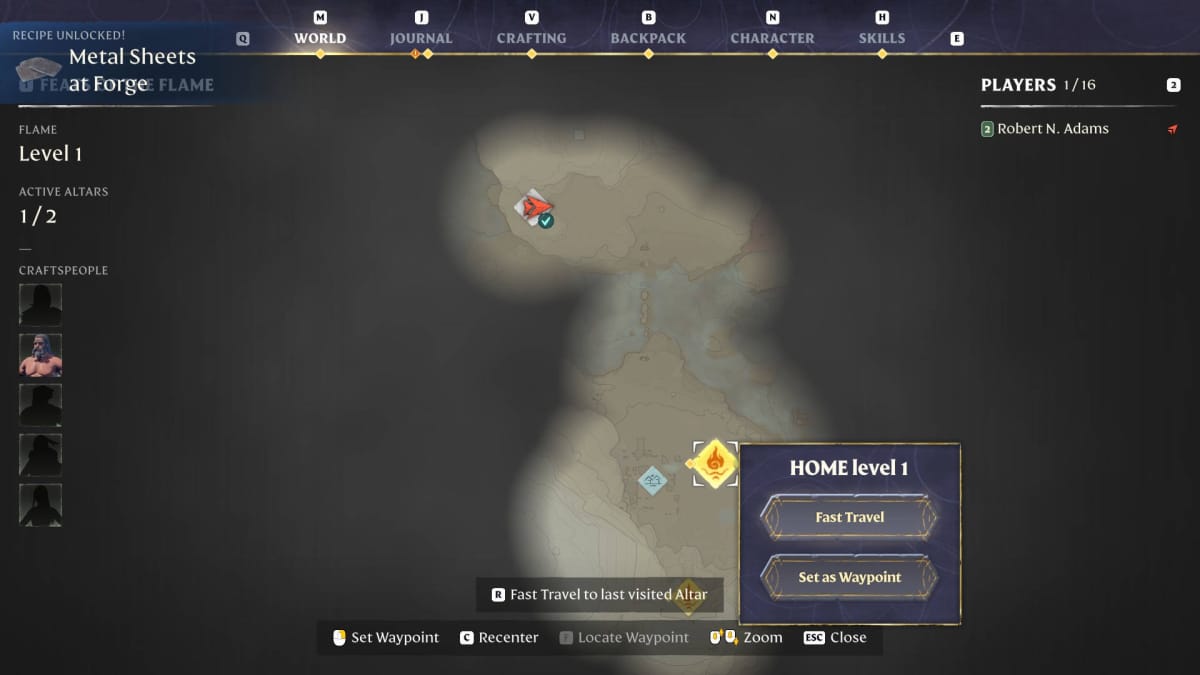
You have now rescued the Blacksmith! It's time to return home, but we don't need to walk back. Instead, open up the map, left-click on your base, and click "Fast Travel" -- you'll be teleported home in no time.
It's Only the Beginning
Now that you're back at home, your next goal is to craft a Summoning Staff. Fortunately, it only costs a single Twig -- you can easily find one somewhere nearby.
Put the Summoning Staff on your hotbar and press Tab to use it. Place the Blacksmith on the ground near your Flame Altar and you'll get access to this NPC and all of the services he offers.
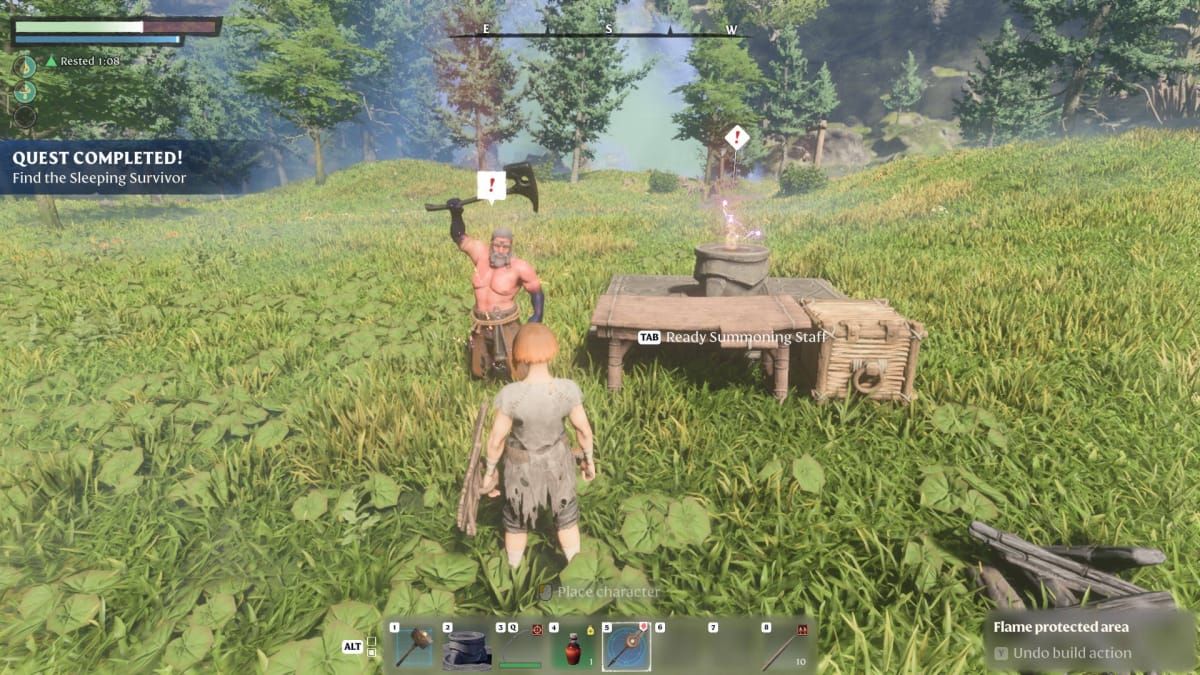
Activating the Blacksmith NPC opens up several new Quests. You're going to have to venture into the Shroud again soon and start rescuing other NPCs shortly after that.
For now, your immediate focus should be on getting better armor, getting a Grappling Hook, and getting a Glider. There's a whole world of adventure to explore in Enshrouded -- check out our other guides below to learn more about the game!

Enshrouded Multiplayer Functionality
Enshrouded supports online multiplayer for up to 16 players in one game.
How to Save
You can save your game by returning to the main menu or exiting. If your game does not save upon exiting, you may have a corrupted world file and you'll probably have to start a new world.
Enshrouded Save File Location | World Save Location
You can find the Enshrouded Save Files in:
C:\Users\USERNAME\Saved Games\Enshrouded
Where "USERNAME" is your Windows username.
If the Save File folder is empty, you may need to download your save files from the Steam Cloud. You can manually back them up or copy them over once you've downloaded them.
Enshrouded Death Consequences
If you die in Enshrouded, you will drop some (or all) of whatever you're carrying in your Backpack and Hotbar on the ground. Any equipment (such as tools) and equipped armor will remain with you, but you'll lose any crafting resources you've found and certain other items.
How to Heal
There are three ways to heal in Enshrouded:
- Use a healing item such as a Bandage or a Potion.
- Eat food with the "Health Regeneration" buff such as Purple Berries or Strawberry.
- Equip armor with a health regeneration effect.
Purple Berries are an abundant early-game resource that can serve as an effective healing item.
Unfortunately, there does not appear to way to passively regenerate health without equipment that provides this buff.
Thanks for reading our Enshrouded Guide for new players! If you found it helpful, you'll find plenty more guides to help you learn about the game below!
Have a tip, or want to point out something we missed? Leave a Comment or e-mail us at tips@techraptor.net
